AWS Amplify | Custom Authentication
AWS Amplify is a fantastic tool for quickly getting up and running with a full-fledged application. It has the amazing capability to incorporate features such as user Authentication.

If you’re using React then you can use the withAuthenticator Higher-Order Component to handle your full-suite of Authentication. As useful as this is, for production you’d typically want to customize this to meet your app’s needs and styling. I took on the challenge of breaking out the Amplify Auth method and building my own Sign-In process to see how it all fits together.
Getting Started
I’m going to assume you’ve gone through the process of setting up your Amplify configuration. If you’re looking for a complete intro I recommend this lengthy but really instructive introduction to Amplify: Video.
Let’s start by creating a new React app and initializing Amplify in the application.
yarn create react-app <APP-NAME>
amplify init
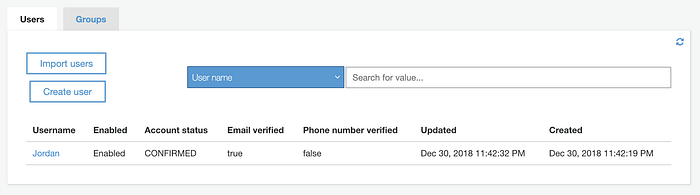
Let’s now add Authentication to our Amplify project. Once that’s done we push the Auth addition to AWS. Once we push it, AWS will scaffold AWS Cognito and User pools.
amplify add auth
amplify push
Once that’d done you’ll see that an aws-exports.js file is created within our React app’s src folder. We need to link this auto-generated config to our React app manually:
import Amplify from 'aws-amplify'import config from './aws-exports'Amplify.configure(config)

Let’s get Coding
I started out by creating a component called Authentication. This will handle the local state for the various sub-components of the authentication process. Those include:
- SignUp
- Verification
- Sign In
- Welcome (once the authentication is completed).
Authentication also handles switching between the various stages shown above.
Our App component looks like this:
Here’s the Authentication component. We have state values for all the various form input fields across all sub-components. We use componentDidMount to see if there is a persisted, authenticated user from a previous session. We use Auth.currentAuthenticatedUser to check for this. handleFormInput is a callback used to handle changes to all of the input fields in sub-components. AuthComponent is used to handle switching between the sub-components. switchComponent is a callback function used for switching the rendered component.
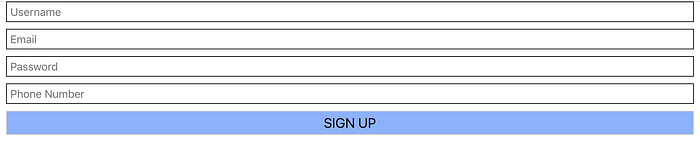
Here’s the SignUp Component. It’s mostly just a form. It also has a method called handleSignUp which triggers the AWS command to sign up the user and then switch the rendered component to Verify.
Now we can move on to the Verify authentication component. AWS makes this really easy to handle. Straight out of the box it handles email authentication.

Now we can move on to SignIn. This will complete the authentication.

Now we finally have our verified user in the AWS Cognito User Pool!